
Today we posted a guide on how to configure your Windows Phone with Zimbra. This guide will give you steps on how to configure the native app of your Windows Phone.
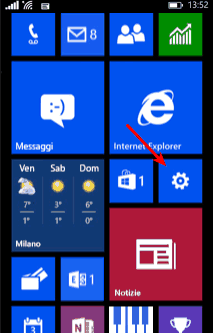
1. On the Home screen of Windows Phone click the Settings icon (the gear icon).
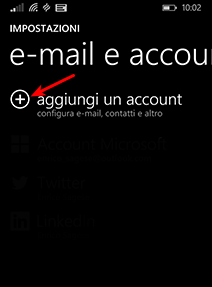
Scroll down and click e-mail address and account.

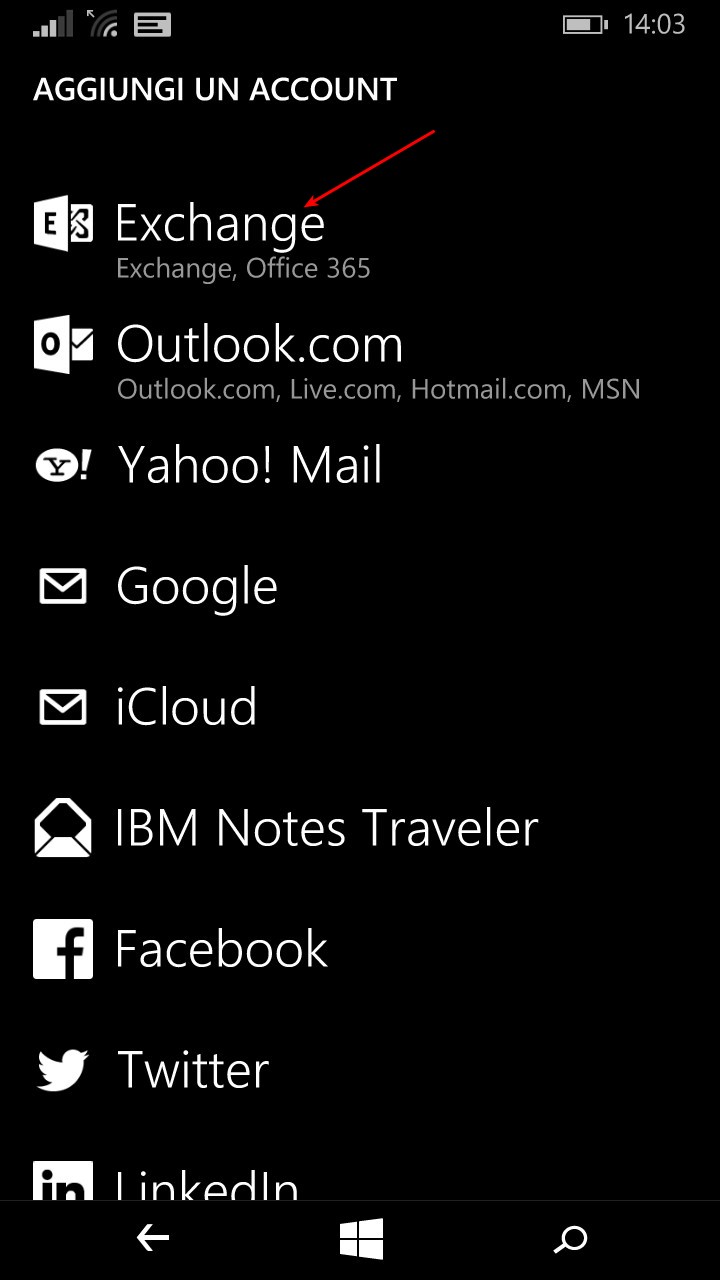
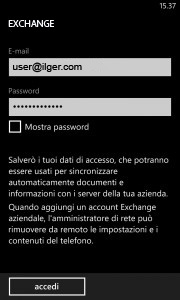
4. Enter the information of your account
-
Email: Here you enter your e-mail, for example user@ilger.com
-
Password: Here you enter the password of the email that you have just entered
Now you can click on Login
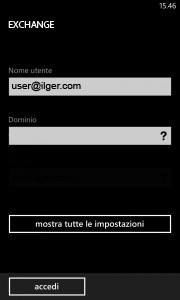
Now you have to re-enter details of your account:
-
Username: Here you enter your e-mail, for example user@ilger.com
-
Domain: Here you have to leave it blank
Now you can click on Login
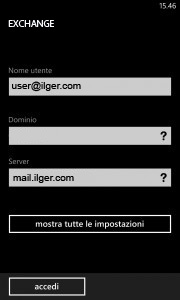
Note: if the auto-detection of the server doesn’t work, will open a screen where you click Advanced and then you must enter the following parameters:
-
Username: Here you enter your e-mail, for example user@ilger.com
-
Domain: Here you have to leave it blank
-
Server: Here you enter the name of your server that will mail.dominio.com
5. Now if you click on Show all the settings you can modify these parameters:
-
Account name: Here you enter a name for the account and you can enter anything you want
-
Download new content: Here you can choose how often to check for new email
-
Download emails received: Here you enter the date when synchronizing your email
-
Content to be synchronized: Here you can choose which items to sync
6. Click on Login and right now your Zimbra account is configured and synchronized.